
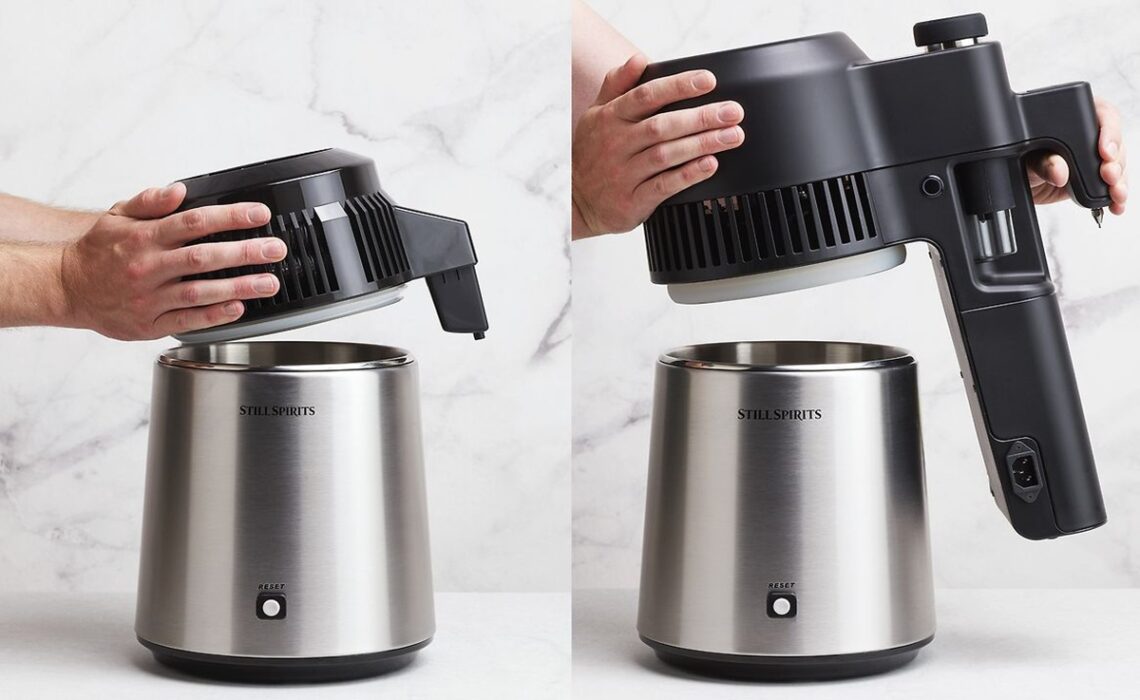
The Compact Air Still Pro has become a game-changer for Australians keen to explore home distilling without the steep learning curve. This clever bit of kit strips away the complications typically associated with traditional pot stills, making it perfect for beginners who want quality results without the fuss. Whether you’ve got a small kitchen or a shed with limited space, this unit fits right in.
In this guide, we’ll walk you through everything you need to know about the Compact Air Still Pro. From understanding how it works to navigating Australian distilling laws, setting up your first wash, and maximising your output we’ve got you covered. By the end, you’ll have the confidence to start your home distilling journey the right way.
What Is the Compact Air Still Pro?
Key Features and Specifications
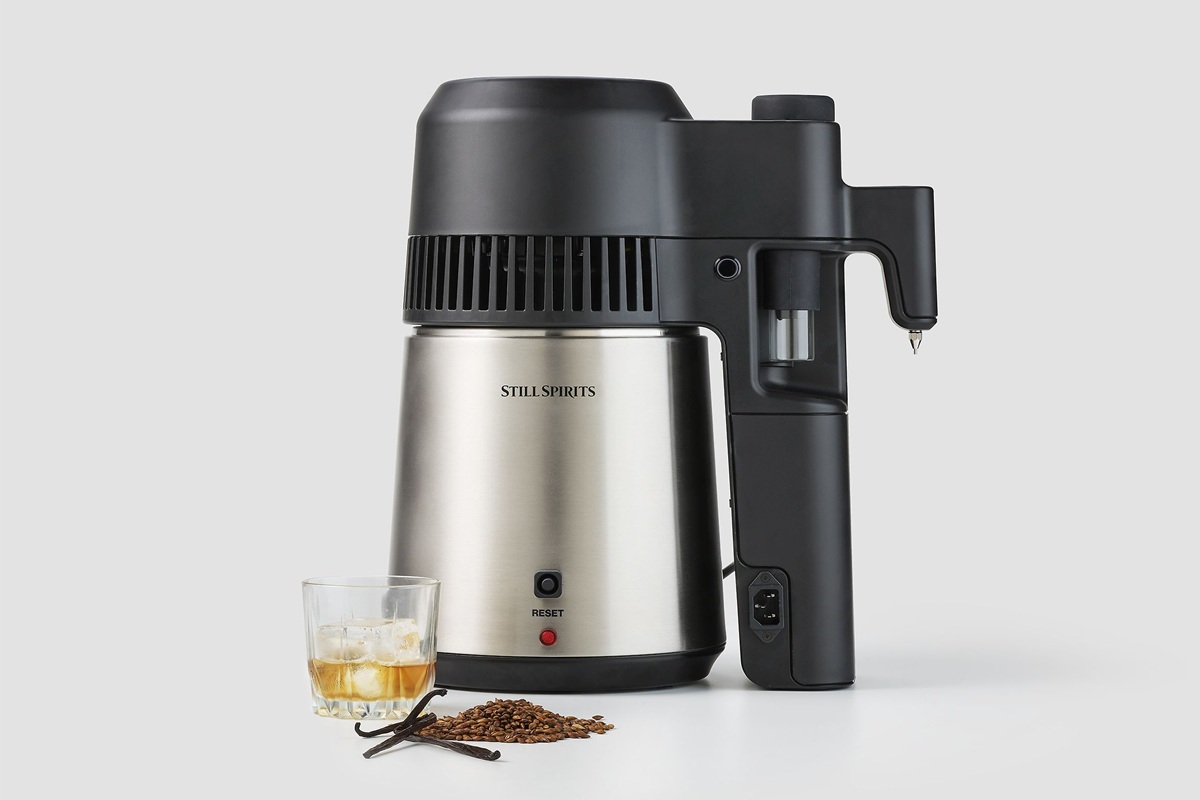
The Compact Air Still Pro is a countertop distillation unit designed with simplicity in mind. It features a 4-litre stainless steel boiler, making it compact enough to store in a cupboard yet capable of producing decent yields. The built-in fan-assisted cooling system eliminates the need for external water connections, which is a massive plus for beginners.
How Does the Air Still Pro Differ from Traditional Pot Stills?
Traditional pot stills require constant monitoring, external cooling water, and considerable space. They also demand a fair bit of technical knowledge to operate safely. The Air Still Pro, on the other hand, uses air cooling technology, making it self-contained and far less hands-on.
Why Choose the Compact Air Still Pro for Beginner Distilling?
Ease of Use for First-Time Distillers
Let’s be honest nobody wants their first distilling experience to feel like a chemistry exam. The Air Still Pro removes that barrier completely. Its one-button operation means you can start producing spirits within minutes of unboxing. There’s no complicated temperature monitoring or manual adjustments required.
Space-Saving Design for Small Kitchens and Sheds
Living in an apartment or working with a compact shed? No worries. The Air Still Pro’s footprint is roughly the size of a kettle, making it perfect for small spaces. When you’re done, simply pop it in a cupboard until your next distilling session.
Safety Features That Matter
Safety should always come first, especially when dealing with alcohol production. The Air Still Pro includes thermal cut-out protection and is constructed from food-grade stainless steel. These features make sure you can distil with confidence, knowing the unit won’t overheat or pose contamination risks.
Is Home Distilling Legal in Australia?
Understanding Australian Distilling Laws and Regulations
Here’s something crucial before you get started: in Australia, it’s perfectly legal to own a still. However, producing alcohol without the proper licensing is another matter entirely. The Australian Taxation Office (ATO) regulates spirit production, and distilling without a licence can result in hefty fines.
Permits and Licensing Requirements
To legally distil spirits at home, you’ll need to apply for an excise manufacturer licence through the ATO. While this might sound daunting, the process is straightforward for small-scale hobbyists. Many home distillers use their Air Still Pro to produce essences or distil water legally while they navigate the licensing process.
How Does the Compact Air Still Pro Work?
Step-by-Step Distillation Process
The distillation process with the Air Still Pro is refreshingly simple:
- Prepare your fermented wash and pour it into the 4-litre boiler
- Attach the collection jug and lid securely
- Plug in the unit and switch it on
- The internal element heats the wash, producing alcohol vapour
- The fan-cooled condenser turns vapour back into liquid
- Collect your distillate in the provided jug
The entire run takes approximately 2-3 hours, depending on your wash strength
What Can You Distil with an Air Still Pro?
Beyond spirits, this versatile unit excels at producing distilled water, essential oils, and flavoured essences. Many beginners start with neutral spirits using turbo yeast, then progress to flavoured creations using Still Spirits essences or natural botanicals.
Setting Up Your Compact Air Still Pro
Unboxing and Assembly Guide
When your Air Still Pro arrives, you’ll find the main unit, collection jug, and instruction manual inside. Assembly takes mere minutes simply attach the collection jug to the outlet and you’re ready to go. Give everything a thorough clean with warm soapy water before your first use.
Essential Accessories and Add-Ons for Beginners
To get the best results, consider picking up:
- A quality hydrometer for measuring alcohol content
- Activated carbon for filtering your spirits
- Still Spirits essences for flavouring
- Fermentation vessels and airlocks
- Turbo yeast for consistent wash preparation
What Is the Best Wash Recipe for Air Still Beginners?
Simple Turbo Yeast Wash for Neutral Spirits
For your first batch, keep it simple. A basic turbo yeast wash requires just water, sugar, and turbo yeast. Mix according to package directions, ferment for 5-7 days, and you’ll have a wash ready for distilling. This produces a clean, neutral spirit perfect for flavouring.
Creating Flavoured Spirits at Home
Once you’ve mastered the basics, experiment with flavoured spirits. Add botanicals during distillation or use commercial essences post-distillation. The possibilities range from classic gin-style spirits to whiskey, rum, and fruit liqueurs.
How Much Alcohol Does the Air Still Pro Produce?
Yield Expectations and Output Quality
From a single 4-litre run, expect approximately 700ml to 1 litre of spirit at varying strengths. The first portion (foreshots) should always be discarded, while the hearts provide your quality drinking spirit. Output quality improves significantly with practice and proper carbon filtering.
Tips for Maximising Efficiency
To get the most from each run:
- Use quality turbo yeast for higher alcohol washes
- Allow fermentation to complete fully before distilling
- Run your carbon filtering multiple times for smoother spirits
- Keep your unit clean between runs
Maintaining and Cleaning Your Compact Air Still Pro
Routine Cleaning Best Practices
After each use, rinse the boiler with warm water and mild detergent. Avoid abrasive cleaners that might damage the stainless steel. A periodic vinegar rinse helps remove any mineral buildup from your water supply.
Long-Term Care and Storage
Store your Air Still Pro in a dry location with the lid off to prevent moisture accumulation. Check the power cord regularly for any damage, and inspect seals before each use to maintain optimal performance.
Where to Buy the Compact Air Still Pro in Australia
Trusted Retailers and Online Stores
Several reputable Australian retailers stock the Air Still Pro, including home brew shops and online specialists. Look for established sellers offering warranty support and genuine products. Avoid suspiciously cheap alternatives that might be counterfeit.
What to Look for When Purchasing
When buying, confirm the unit includes Australian electrical compliance certification. Check reviews from other Australian buyers, and verify the retailer offers local customer support should any issues arise.
Final Thoughts
After exploring everything the Compact Air Still Pro offers, it’s clear this unit ticks all the right boxes for beginners. Its simplicity, compact design, and safety features make it an excellent entry point into home distilling. You won’t find yourself overwhelmed by complicated processes or expensive accessories.
That said, remember to sort your licensing before producing spirits. The ATO takes compliance seriously, and it’s not worth the risk of hefty penalties. Start with legal applications like distilled water or essential oils while you navigate the permit process.
If you’re ready to begin your home distilling journey, the Compact Air Still Pro represents fantastic value. It’s affordable, user-friendly, and capable of producing quality results that’ll genuinely impress. So why not give it a crack? Your first homemade spirit could be just a few weeks away.