
To get the best retractable awning installation, one must take guidance or help from the manual that is always provided while we buy the stuff. Also, experts are to be contacted if the projects are for large and broader space. Before buying the retractable awnings, one must measure the exact size of the place that has to be covered by installing these awnings. A retractable awning is useful and looks good too when installed properly and matching the colour with the backdrop.
The colour of the awnings must be selected carefully as it might reflect the solar radiation upon the surface around and the ground. The material of the awning can be selected, and the design and pattern can be customized as well. Retractable awning installation is not that tough if we know what exactly is to be done, such as the prior measurements and the exact pattern of hanging.
The First Step While Retractable Awning Installation
The very first step is to drill holes and get the measurements done. Also keeping in mind the fact that retractable awning installation needs no deeper holes and if made so wrongly the hold over the awning clutch can be loose which is definitely not wanted.

Retractable Awning Installation; The Surface Matters:
The surface upon which the retractable awning installation is being made, matters a lot, as manuals show different processes for different surfaces such as when it is vinyl, the process is a bit different from that of a concrete wall surface.
Sequential Retractable Awning Installation Process:
- locating the brackets
- measuring the holes, distance of the brackets
- getting the holes drilled
- placing the studs
- having the diameters of the holes measured
- getting the holes filled with silicon sealing for holding the brackets
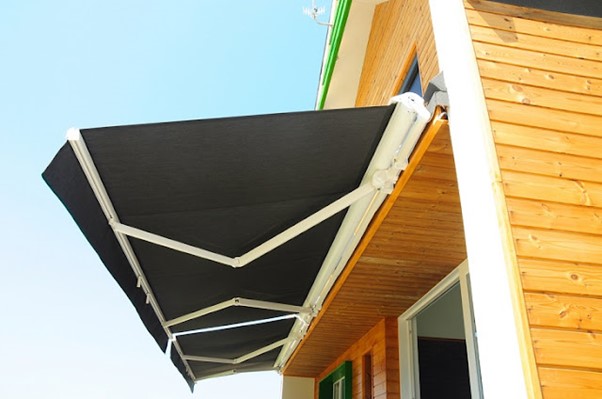
Also, getting the installations done upon the wooden frame is different but is convenient enough. For concrete walls, wall mounting brackets are also used during retractable awning installation. To support wall mounts, roof mounting brackets are used. Aligning the brackets along the holes is the main challenge; once it is done the holes can hold the brackets properly. When it is a concrete wall, one need concrete anchors which are available in the market or masonry contractors can be contacted for getting the stuff supplied.
Other Aspects While Retractable Awning Installation:
- Mounting the awnings firmly so that strong wind or rain cannot break the mounting and dislocate the awnings.
- Fastening the brackets is a must
- Sealing the holes with silicon sealing after insertion of the brackets
- Strong, sharp and high-quality toggle bolts are suggested to be used when it is a concrete wall and drilling gets tough
- Positioning the studs carefully is a must
- Tools used must be kept ready for use such as bolts, crews, chalk for marking, electric drill, heavy duty, mason drill and so on and so forth.
Vertical and horizontal lines must be drawn with a marker or might be a chalk upon the surface to determine the exact location of the holes and positioning of the brackets as well. The height at which the retractable awning installation is to be done has to be kept in mind. An optimum height must be maintained so that it is not too low or not too high. These are some of the nitty grittiest of installing a retractable awning at any place. Following the guidebook or the manual provided is always suggested along with expert advice and opinion.
